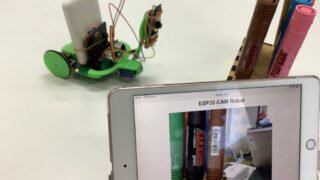
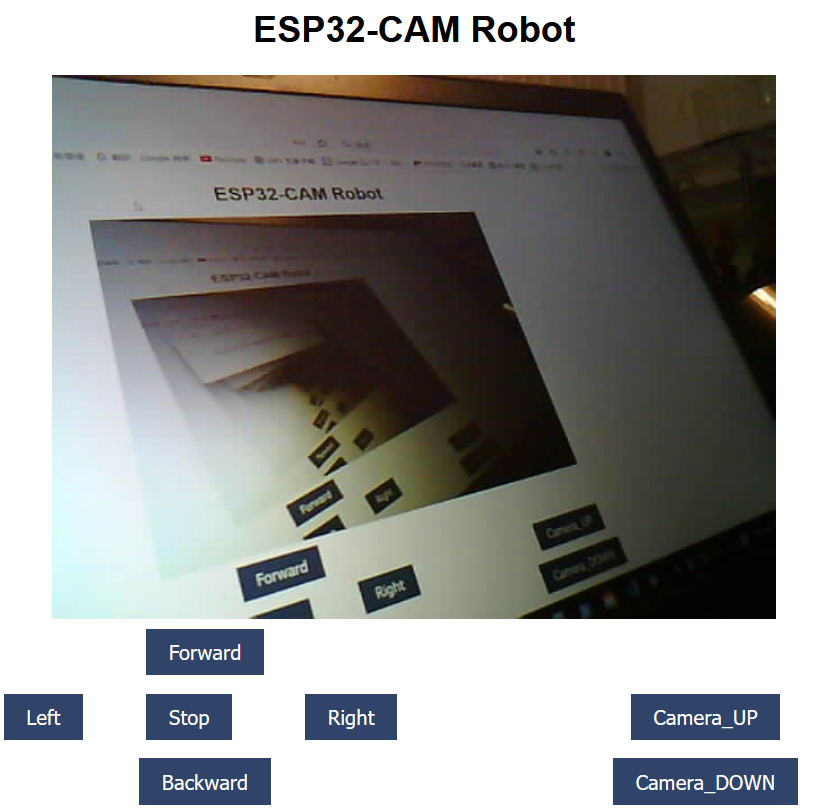
ブラウザー上で、カメラから送られてきた映像をみながら「しなのカー」をコントロールするシステムを作ります。
まずは、動作したビデオを見るとよく分かります。
システムの概要
機材
しなのカー、モバイルバッテリー、ESP32-WROVER CAMボード

構成
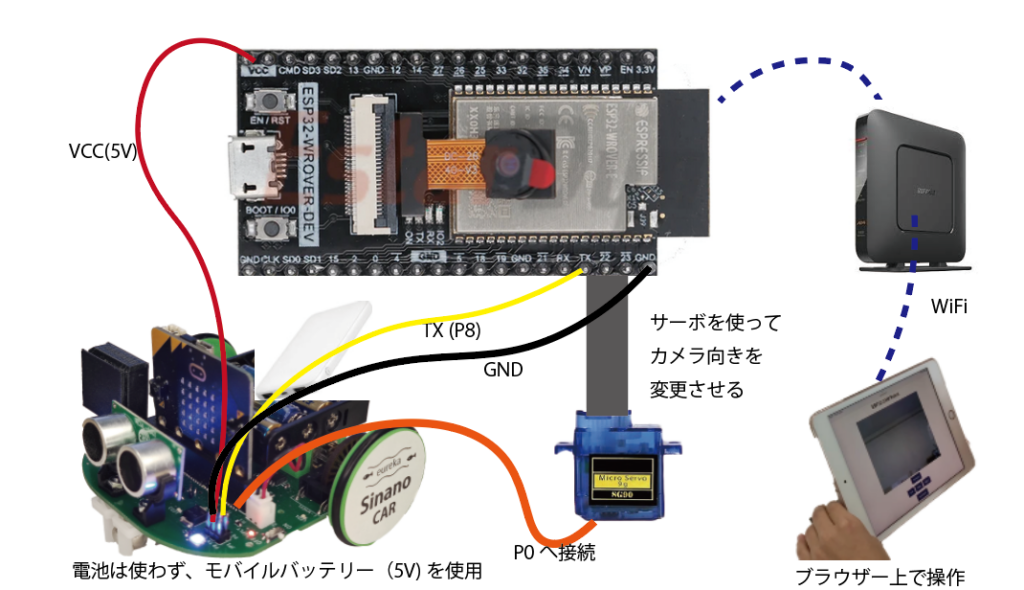
このシステムを使うためには、ESP32とmicro:bitの2つのプログラムが必要です。
特に、ESP32を扱うには、ArduinoIDEの操作が必要です。ネット上にいろいろ扱い方が出ています。
使用ボードは、「ESP32-WROVER」ですので、お間違いなく。
ESP32プログラム編
ブラウザーで車を操作する部分とカメラの映像を送る部分は、ESP32-WROVER CAMボードを利用します。ただし、しなのカー上のmicro:bitに、取得したデータ(前後左右と、サーボモーターの上下データ)を伝える部分は、有線接続したシリアル通信を利用しました。
まずは、使用したプログラムです。SSIDとPASSWORDには、自分の環境に合わせて変更します。
// プログラミングカーをカメラ(ブラウザ-)上でコントロール
// ユーレカ工房 2023/12/27
//ESP32のハードウェアシリアルの評価
//ESP32 UART0で文字列を送信(GPI01ピン使用)
//micro:bit P1で受信(P1使用)
//   ESP32              micro:bit
//   GND    -----------  GND
//   GPI01(TX) -------   P1(RX)

#include "Arduino.h"
#include <WiFi.h>
#include "esp_camera.h"
#include "esp_http_server.h"
#include "esp_timer.h"
#include "img_converters.h"
#include "fb_gfx.h"

const char* ssid = "********";
const char* password = "**********";

#define PWDN_GPIO_NUM    -1
#define RESET_GPIO_NUM   -1
#define XCLK_GPIO_NUM    21
#define SIOD_GPIO_NUM    26
#define SIOC_GPIO_NUM    27

#define Y9_GPIO_NUM      35
#define Y8_GPIO_NUM      34
#define Y7_GPIO_NUM      39
#define Y6_GPIO_NUM      36
#define Y5_GPIO_NUM      19
#define Y4_GPIO_NUM      18
#define Y3_GPIO_NUM       5
#define Y2_GPIO_NUM       4
#define VSYNC_GPIO_NUM   25
#define HREF_GPIO_NUM    23
#define PCLK_GPIO_NUM    22

#define PART_BOUNDARY "123456789000000000000987654321"
static const char* _STREAM_CONTENT_TYPE = "multipart/x-mixed-replace;boundary=" PART_BOUNDARY;
static const char* _STREAM_BOUNDARY = "\r\n--" PART_BOUNDARY "\r\n";
static const char* _STREAM_PART = "Content-Type: image/jpeg\r\nContent-Length: %u\r\n\r\n";

HardwareSerial mySerial(0);

httpd_handle_t camera_httpd = NULL;
httpd_handle_t stream_httpd = NULL;

static const char PROGMEM INDEX_HTML[] = R"rawliteral(


<html>
  <head>
<meta charset="UTF-8">
<title>ESP32-CAM Robot</title>
    <meta name="viewport" content="width=device-width, initial-scale=1">
<meta name="GENERATOR" content="JustSystems Homepage Builder Version 21.0.1.0 for Windows">
<style>
      body { font-family: Arial; text-align: center; margin:0px auto; padding-top: 30px;}
      table { margin-left: auto; margin-right: auto; }
      td { padding: 8 px; }
      .button {
        background-color: #2f4468;
        border: none;
        color: white;
        padding: 10px 20px;
        text-align: center;
        text-decoration: none;
        display: inline-block;
        font-size: 18px;
        margin: 6px 3px;
        cursor: pointer;
        -webkit-touch-callout: none;
        -webkit-user-select: none;
        -khtml-user-select: none;
        -moz-user-select: none;
        -ms-user-select: none;
        user-select: none;
        -webkit-tap-highlight-color: rgba(0,0,0,0);
      }
      img {  width: auto ;
        max-width: 100% ;
        height: auto ;
      }
    </style>
  </head>
  <body>
    <h1>ESP32-CAM Robot</h1>
    <img src="" id="photo" >
    <table>
      <tr>
    <td colspan="3" style="text-align : center;">
    <button class="button" onmousedown="toggleCheckbox('forward');" ontouchstart="toggleCheckbox('forward');" onmouseup="toggleCheckbox('stop');" ontouchend="toggleCheckbox('stop');">Forward
          </button>
    </td>
    <td align="center" width="113"> </td>
  </tr>
      <tr>
    <td align="center" width="117">
    <button class="button" onmousedown="toggleCheckbox('left');" ontouchstart="toggleCheckbox('left');" onmouseup="toggleCheckbox('stop');" ontouchend="toggleCheckbox('stop');">Left
          </button>
    </td>
    <td align="center" width="133">
          <button class="button"
            onmousedown="toggleCheckbox('stop');"
            ontouchstart="toggleCheckbox('stop');">Stop
          </button>
        </td>
    <td align="center" width="145">
    <button class="button" onmousedown="toggleCheckbox('right');" ontouchstart="toggleCheckbox('right');" onmouseup="toggleCheckbox('stop');" ontouchend="toggleCheckbox('stop');">Right
    </td>
    <td align="center" width="113">
 </td>
    <td align="center" width="248">
 <button class="button" onmousedown="toggleCheckbox('upper');" ontouchstart="toggleCheckbox('upper');" onmouseup="toggleCheckbox('stop');" ontouchend="toggleCheckbox('stop');">Camera_UP
          </button>


 </td>
  </tr>
      <tr>
    <td colspan="3" align="center">
    <button class="button" onmousedown="toggleCheckbox('backward');" ontouchstart="toggleCheckbox('backward');" onmouseup="toggleCheckbox('stop');" ontouchend="toggleCheckbox('stop');">Backward </button>
    </td>
    <td align="center" width="113">
    </td>
    <td align="center" width="248">
    <button class="button" onmousedown="toggleCheckbox('down');" ontouchstart="toggleCheckbox('down');" onmouseup="toggleCheckbox('stop');" ontouchend="toggleCheckbox('stop');">Camera_DOWN
          </button>


 </td>
  </tr>

    </table>
    <script>
      function toggleCheckbox(x) {
        var xhr = new XMLHttpRequest();
        xhr.open("GET", "/action?go=" + x, true);
        xhr.send();
      }
      window.onload = document.getElementById("photo").src
      = window.location.href.slice(0, -1) + ":81/stream";
    </script>
  </body>
</html>


)rawliteral";
static esp_err_t index_handler(httpd_req_t *req){
  httpd_resp_set_type(req, "text/html");
  return httpd_resp_send(req, (const char *)INDEX_HTML, strlen(INDEX_HTML));
}

static esp_err_t stream_handler(httpd_req_t *req){
  camera_fb_t * fb = NULL;
  esp_err_t res = ESP_OK;
  size_t _jpg_buf_len = 0;
  uint8_t * _jpg_buf = NULL;
  char * part_buf[64];

  res = httpd_resp_set_type(req, _STREAM_CONTENT_TYPE);
  if(res != ESP_OK){
    return res;
  }

  while(true){
    // Take Picture with Camera
    // fb = NULL;
    fb = esp_camera_fb_get();
    if (!fb) {
      mySerial.println("Camera capture failed");
      res = ESP_FAIL;
    } else {
      if(fb->width > 400){
        if(fb->format != PIXFORMAT_JPEG){
          bool jpeg_converted = frame2jpg(fb, 80, &_jpg_buf, &_jpg_buf_len);
          esp_camera_fb_return(fb);
          fb = NULL;
          if(!jpeg_converted){
            mySerial.println("JPEG compression failed");
            res = ESP_FAIL;
          }
        } else {
          _jpg_buf_len = fb->len;
          _jpg_buf = fb->buf;
        }
      }
    }
    if(res == ESP_OK){
      size_t hlen = snprintf((char *)part_buf, 64, _STREAM_PART, _jpg_buf_len);
      res = httpd_resp_send_chunk(req, (const char *)part_buf, hlen);
    }
    if(res == ESP_OK){
      res = httpd_resp_send_chunk(req, (const char *)_jpg_buf, _jpg_buf_len);
    }
    if(res == ESP_OK){
      res = httpd_resp_send_chunk(req, _STREAM_BOUNDARY, strlen(_STREAM_BOUNDARY));
    }
    if(fb){
      esp_camera_fb_return(fb);
      fb = NULL;
      _jpg_buf = NULL;
    } else if(_jpg_buf){
      free(_jpg_buf);
      _jpg_buf = NULL;
    }
    if(res != ESP_OK){
      break;
    }
    //Serial.printf("MJPG: %uB\n",(uint32_t)(_jpg_buf_len));
  }
  return res;
}

static esp_err_t cmd_handler(httpd_req_t *req){
  char*  buf;
  size_t buf_len;
  char variable[32] = {0,};

  buf_len = httpd_req_get_url_query_len(req) + 1;
  if (buf_len > 1) {
    buf = (char*)malloc(buf_len);
    if(!buf){
      httpd_resp_send_500(req);
      return ESP_FAIL;
    }
    if (httpd_req_get_url_query_str(req, buf, buf_len) == ESP_OK) {
      if (httpd_query_key_value(buf, "go", variable, sizeof(variable)) == ESP_OK) {
      } else {
        free(buf);
        httpd_resp_send_404(req);
        return ESP_FAIL;
      }
    } else {
      free(buf);
      httpd_resp_send_404(req);
      return ESP_FAIL;
    }
    free(buf);
  } else {
    httpd_resp_send_404(req);
    return ESP_FAIL;
  }

  sensor_t * s = esp_camera_sensor_get();
  int res = 0;

  if(!strcmp(variable, "forward")) {
    mySerial.println("F");

  }
  else if(!strcmp(variable, "left")) {
    mySerial.println("L");

  }
  else if(!strcmp(variable, "right")) {
    mySerial.println("R");

  }
  else if(!strcmp(variable, "backward")) {
    mySerial.println("B");

  }
  else if(!strcmp(variable, "stop")) {
    mySerial.println("S");

  }

  else if(!strcmp(variable, "upper")) {
    mySerial.println("U");

  }

  else if(!strcmp(variable, "down")) {
    mySerial.println("D");

  }


  else {
    res = -1;
  }

  if(res){
    return httpd_resp_send_500(req);
  }

  httpd_resp_set_hdr(req, "Access-Control-Allow-Origin", "*");
  return httpd_resp_send(req, NULL, 0);
}

void startCameraServer(){
  httpd_config_t config = HTTPD_DEFAULT_CONFIG();
  config.server_port = 80;
  httpd_uri_t index_uri = {
    .uri       = "/",
    .method    = HTTP_GET,
    .handler   = index_handler,
    .user_ctx  = NULL
  };

  httpd_uri_t cmd_uri = {
    .uri       = "/action",
    .method    = HTTP_GET,
    .handler   = cmd_handler,
    .user_ctx  = NULL
  };
  httpd_uri_t stream_uri = {
    .uri       = "/stream",
    .method    = HTTP_GET,
    .handler   = stream_handler,
    .user_ctx  = NULL
  };

  if (httpd_start(&camera_httpd, &config) == ESP_OK) {
    httpd_register_uri_handler(camera_httpd, &index_uri);
    httpd_register_uri_handler(camera_httpd, &cmd_uri);
  }

  config.server_port += 1;
  config.ctrl_port += 1;
  if (httpd_start(&stream_httpd, &config) == ESP_OK) {
    httpd_register_uri_handler(stream_httpd, &stream_uri);
  }
}

void setup() {
  // 2.4V以下になるとリセットがかかるのを止める
  // WRITE_PERI_REG(RTC_CNTL_BROWN_OUT_REG, 0); //disable brownout detector

  mySerial.begin(115200);


  camera_config_t config;
  // XCLK 20MHz or 10MHz
  config.xclk_freq_hz = 20000000;
  config.ledc_channel = LEDC_CHANNEL_0;
  config.ledc_timer = LEDC_TIMER_0;
  config.pin_xclk = XCLK_GPIO_NUM;

  config.pin_d0 = Y2_GPIO_NUM;
  config.pin_d1 = Y3_GPIO_NUM;
  config.pin_d2 = Y4_GPIO_NUM;
  config.pin_d3 = Y5_GPIO_NUM;
  config.pin_d4 = Y6_GPIO_NUM;
  config.pin_d5 = Y7_GPIO_NUM;
  config.pin_d6 = Y8_GPIO_NUM;
  config.pin_d7 = Y9_GPIO_NUM;
  config.pin_vsync = VSYNC_GPIO_NUM;
  config.pin_href = HREF_GPIO_NUM;
  config.pin_pclk = PCLK_GPIO_NUM;

  config.pin_sscb_sda = SIOD_GPIO_NUM;
  config.pin_sscb_scl = SIOC_GPIO_NUM;
  config.pin_pwdn = PWDN_GPIO_NUM;
  config.pin_reset = RESET_GPIO_NUM;

  config.pixel_format = PIXFORMAT_JPEG;
   // FRAMESIZE_ + QVGA|CIF|VGA|SVGA|XGA|SXGA|UXGA
  if(psramFound()){
    mySerial.println("psram Found.");
    config.frame_size = FRAMESIZE_VGA;
    config.jpeg_quality = 10;
    config.fb_count = 2;
  } else {
    mySerial.println("psram not Found.");
    config.frame_size = FRAMESIZE_SVGA;
    config.jpeg_quality = 12;
    config.fb_count = 1;
  }

  // Init Camera
  esp_camera_init(&config);
  /*
  esp_err_t err = esp_camera_init(&config);
  if (err != ESP_OK) {
    Serial.printf("Camera init failed with error 0x%x", err);
    return;
  }*/

  // Wi-Fi connection
  WiFi.begin(ssid, password);
  while (WiFi.status() != WL_CONNECTED) {
    delay(500);
    mySerial.print(".");
  }
  mySerial.println("");
  mySerial.println("WiFi connected");

  mySerial.print("Camera Stream Ready! Go to: http://");
  mySerial.println(WiFi.localIP());

  // Start streaming web server
  startCameraServer();
}

void loop() {
}
参考にしたサイトは、次の通りです。他にも、ネット上にはESP32CAMを使った情報がいろいろあります。それに、サーボの制御ボタンを追加しています。
ESP32の利用方法は、ネット上を参考にしてください。
操作するIPアドレスは、ArduinoIDEのシリアルモニターに表示されます。(この部分が、とてもハードルが高いので、そのうちmicro:bitからWiFiのID,PASSWORDとIPアドレスを表示させられるように改造したものを開発したいです。
接続は、ESP32→micro:bitの一方向だけですので、ESP32の5V,TX,GNDを上図のようにしなのカーに結線します。
micro:bit側のプログラム
ここでは、ESP32からシリアル通信を通して送られたデータを元に、しなのカーを操作するようにプログラムします。ESP32から、前進=F 後進=B 右=R 左=L サーボのアップ=U ダウン=Dの文字列が送られてきますので、それに合わせて しなのカーを動かしています。
ただし、送られてくる文字列の最後尾に「改行など CRとLF」が余計に付いているので、先頭の1文字を取り出すようにしています。
しなのカーの構成
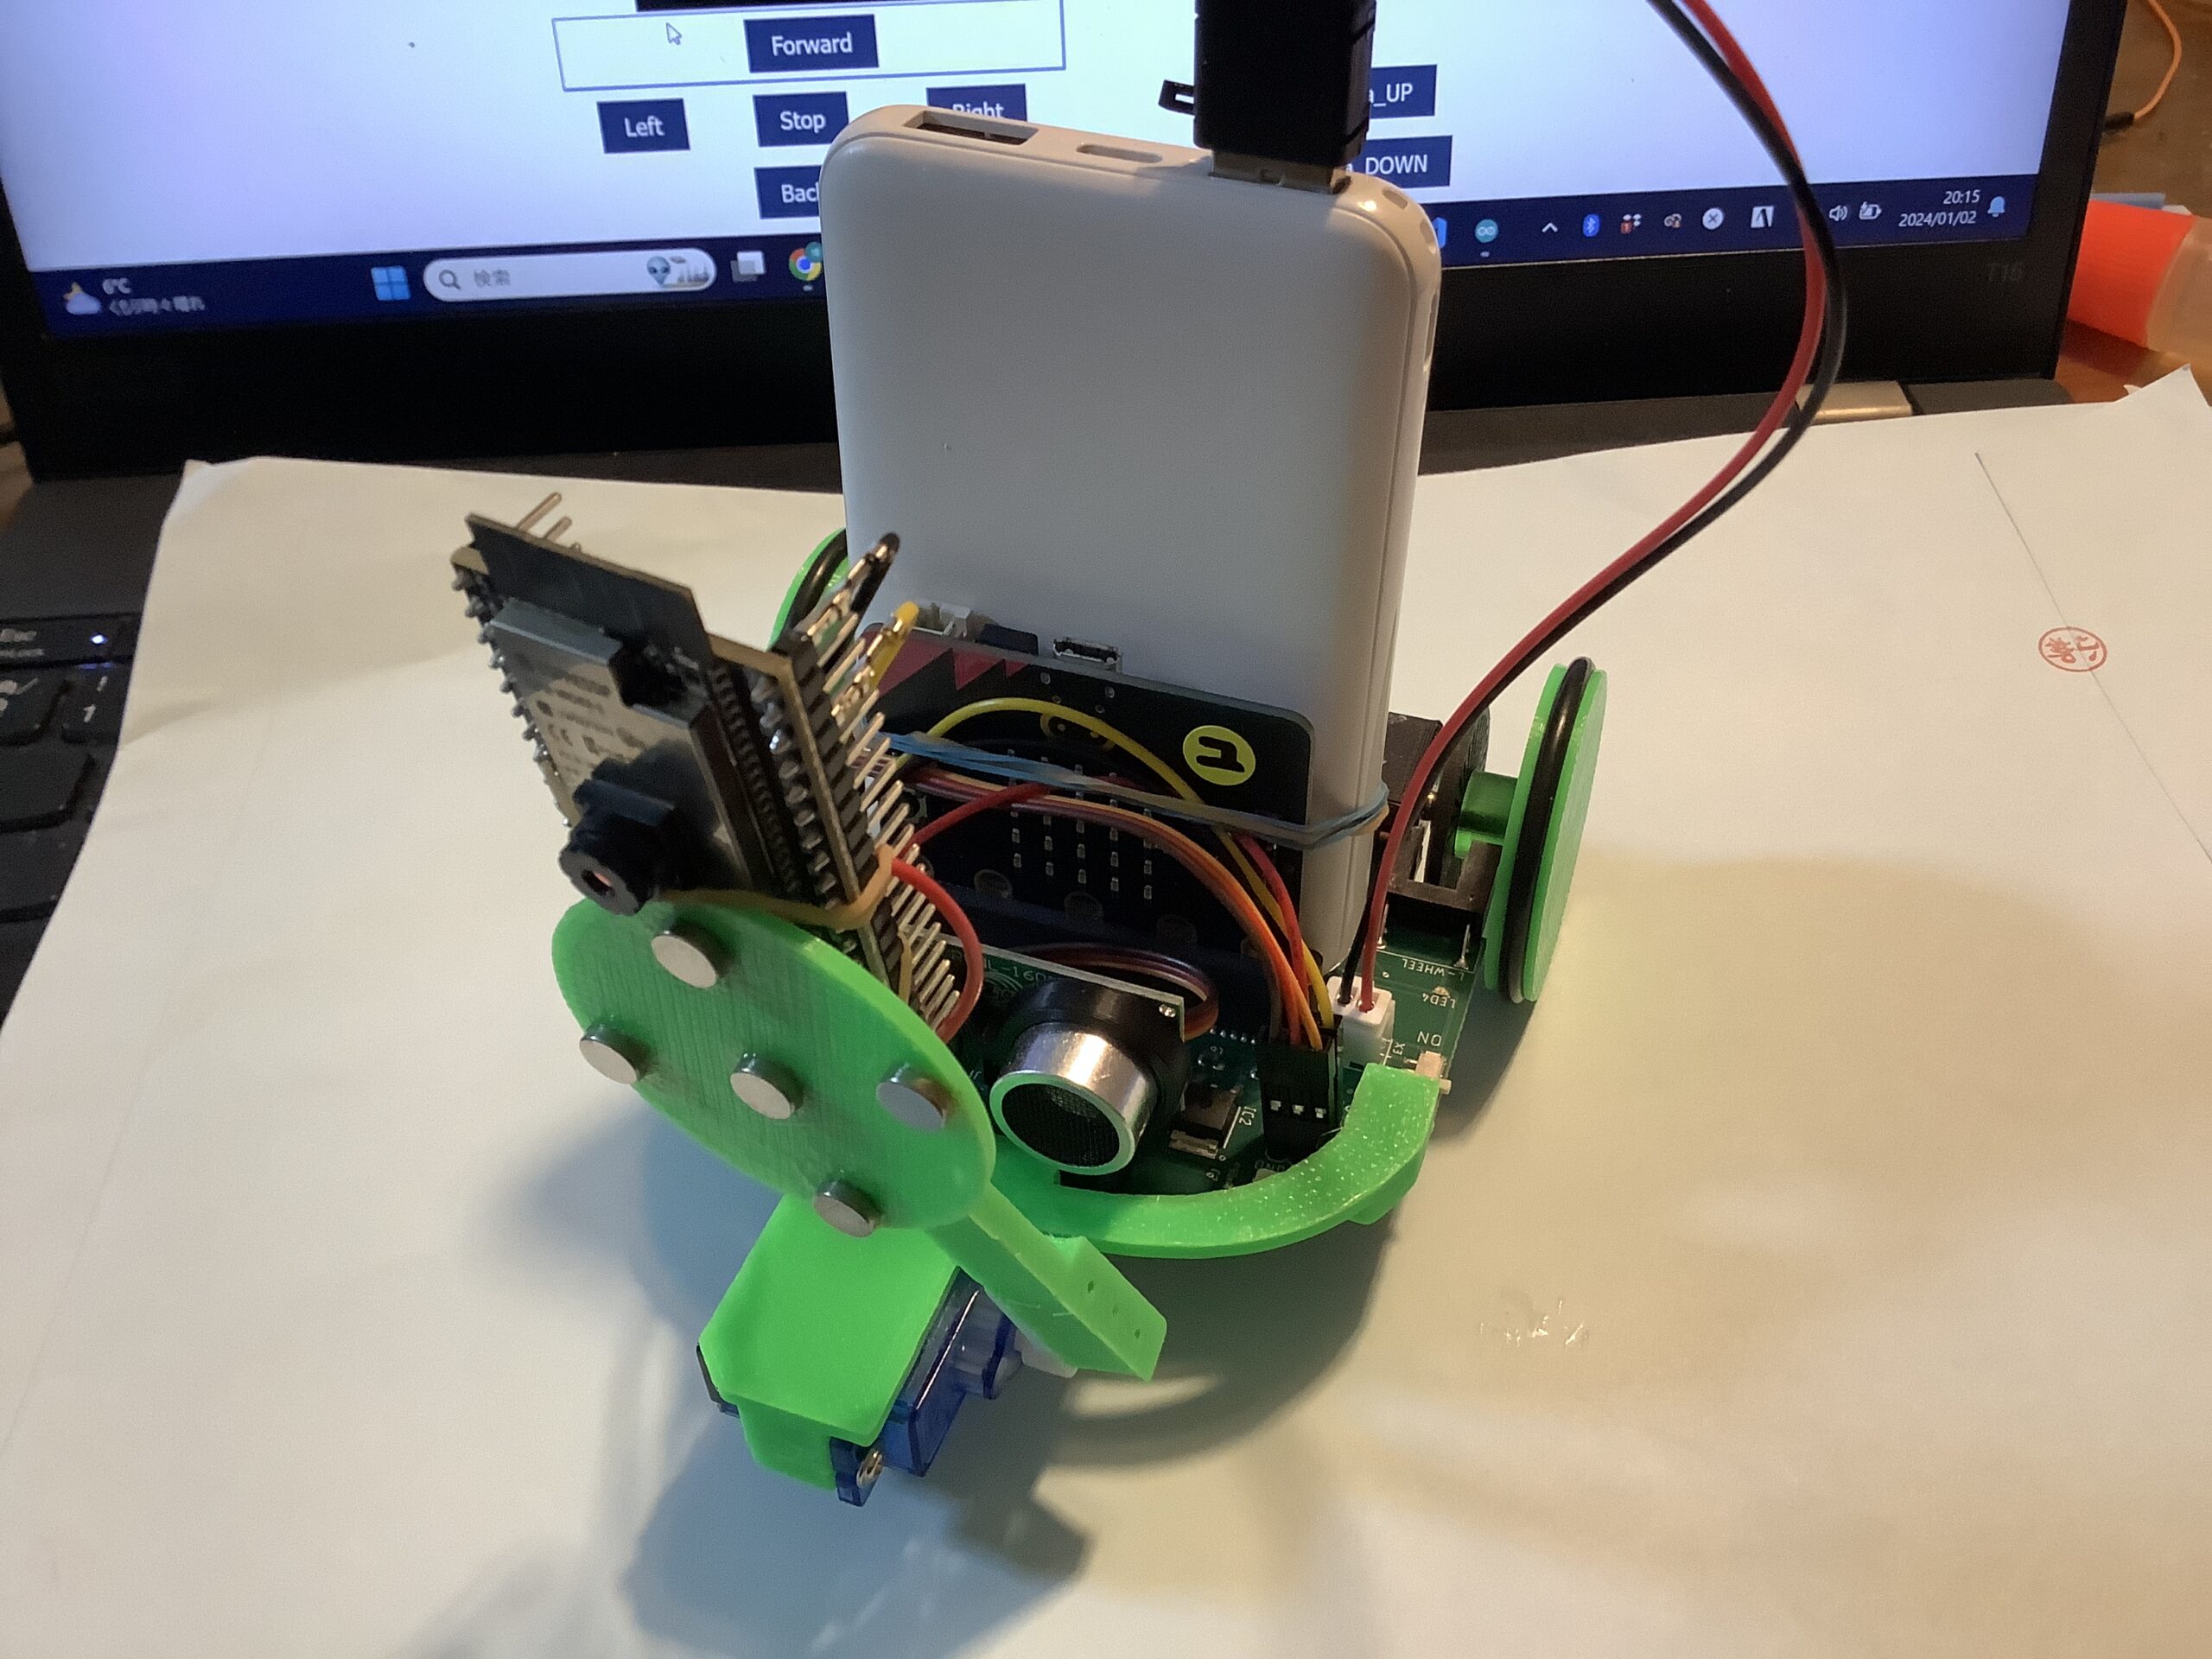
不格好なのですが、以前かるた取りのために作ったアームがありましたので、そこに輪ゴムで取り付けました。
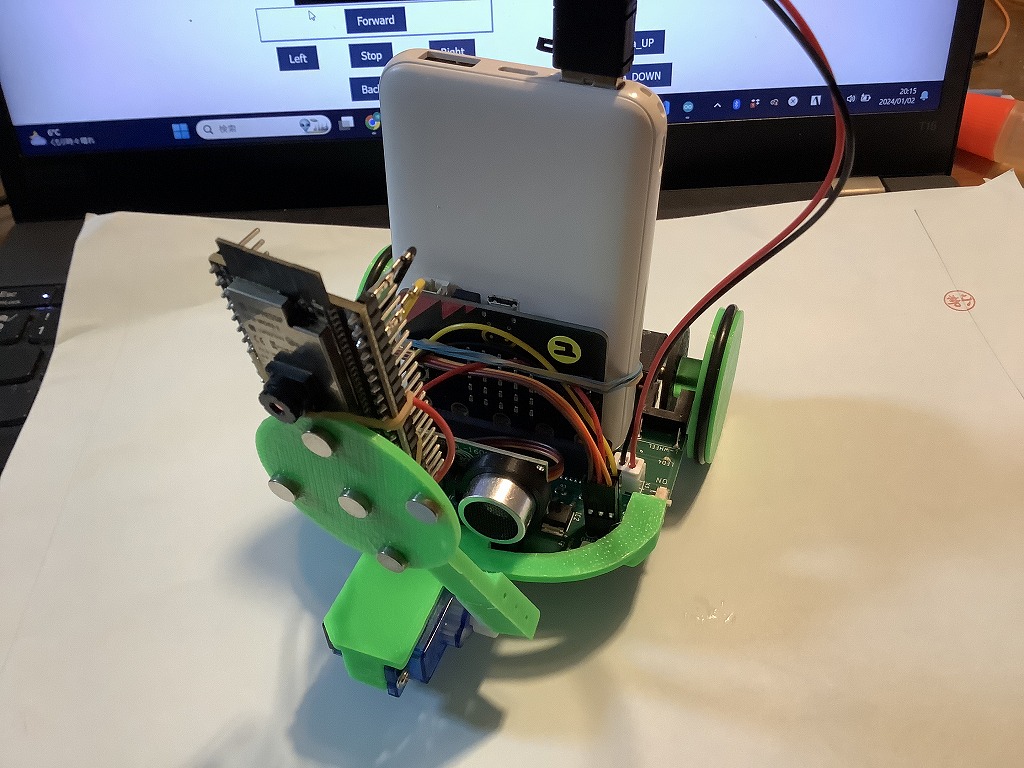

しなのカーの拡張端子を使用。P0にサーボ、P8へはESP32からのTXをつなげます
カメラ付きの探査機を作ってみたい方は、HPよりお問い合わせください。機材などを斡旋いたします。
